Loading Selected Work...
Menu

No Excuses Travel Set – Part II

In an earlier blog, I described the small palette made of an altoids tin and empty palette pans filled by colors of my choice. Recently I was showing some students the wee set when one of them (Thanks, Bill!) took the cap from his water bottle and put it in the tin. Eureka! Six caps fit perfectly in the 2 3/8″x 2 3/4″ size. I first taped them to the bottom but magnetic tape, sticky on one side, works a treat.

I had been looking for a way to help my beginning students make a color wheel successfully. Their travel kits, purchased for the class, had two reds, but one was warm and the other cool. Not adequate for the task. This tiny palette with the 3 primary colors and 3 secondary colors was the solution to my dilemma. I can keep the tins full for each class and save my students from an additional expense. I tested the colors and made a color wheel from them and am satisfied with the results. 

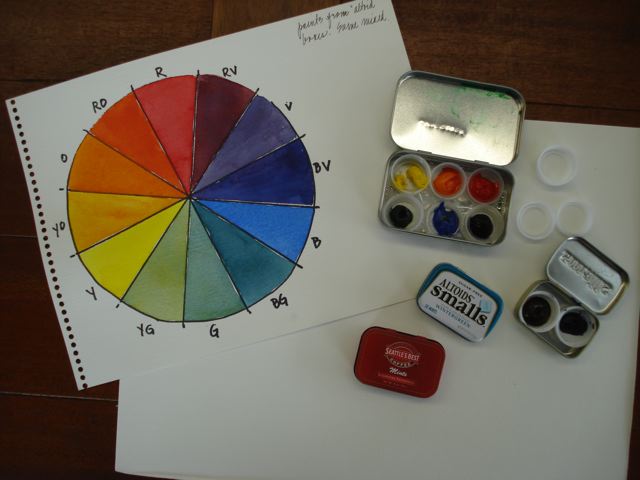
The tiniest altoid tins, 1/1/2’x 2 1/4″, were given to me by another student. (Thanks, Debbie!) Two caps fit perfectly and if they are the larger ones, they fit so snugly there is no need for stickum. The caps I’ve collected come in two sizes. One is smaller in diameter and shallower than the other. The variety of caps fit in the different sizes of tins.

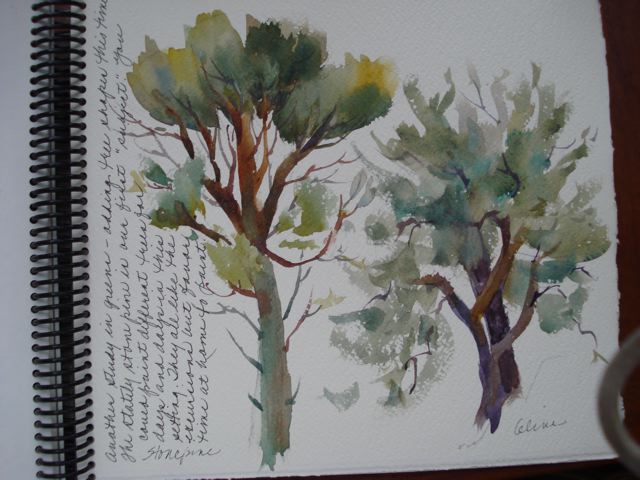
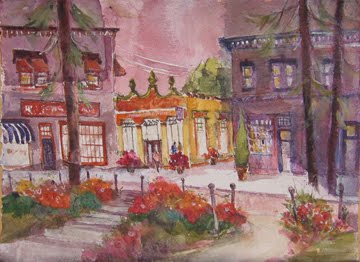
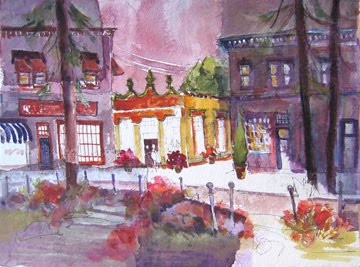
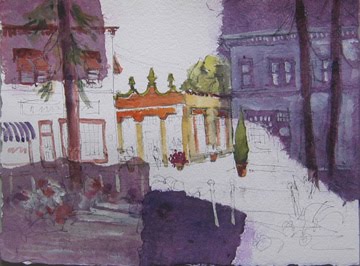
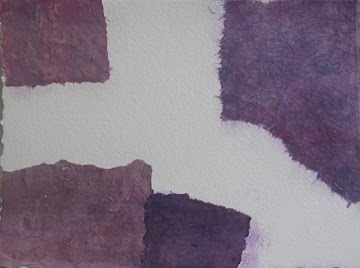
In the sample above, I used ultramarine blue and quinacridone burnt orange – actually 2/3 of the California Watercolor School’s favorite triad – burnt sienna, ultramarine blue and yellow ochre.  The two colors are plenty giving me a warm, a cool and a gray when mixed together. The drawing was done with a Marvy Le Plume pen and I could have made it more travel-friendly if I’d used a water brush. Interestingly, today is Earth Day but that is not the motive for my collection, albeit a good one. I want to have the right tools for what I want to do and I confess to having an addiction to palettes.

Watercolor Musings: Green!

Watercolor Musings: Green!: “Greens in the landscape are so utterly lovely, especially in the spring. Because of their dominance in most landscapes and the variation in …”

Green!

Greens in the landscape are so utterly lovely, especially in the spring. Because of their dominance in most landscapes and the variation in each hue amazingly complex, these lovely colors can be a very real challenge for the painter. Because so many of my students have expressed their frustration with green, I developed a workshop to address the problem.

First we mixed greens from blues, yellows and black:

Then we altered tube greens:

Then they matched greens in leaves. This sketchbook is from a workshop I taught in Tuscany. I had some painters who were just beginning and this was a nice way to begin.

Next I demonstrated the use of greens in trees. The example was from the same trip as the image above.

Finally, if time permits, we use the information in a landscape. This one was done on location at Rancho Los Alamitos, California.

The only way I know to figure something out is to go from the simple to the complex. The first step can be tedious if you don’t pay attention to what you are doing and these charts can become valuable on location, especially for the grayed greens.

I LOVE painting trees so this workshop is a delight to teach!

Watercolor Musings: Final Step – Integrated Collage

Watercolor Musings: Final Step – Integrated Collage: “Formerly Known As Dietrichs by Judy Schroeder The final step for this piece was somewhat going back to the beginning. I didn’t like the for…”

Final Step – Integrated Collage

Formerly Known As Dietrichs by Judy Schroeder

The final step for this piece was somewhat going back to the beginning. I didn’t like the foreground so I re-collaged that part. This opportunity is what makes collage so appealing. Don’t like something? Just collage again and re-do! The foreground was repainted and then I added detail to the buildings, put in shadows, added people, toned down windows, etc. This is a good example of making the whites more special by eliminating most of them. Hard to do sometimes when we are admonished, “Save your whites!” I firmly believe that every painting”rule” should be intentionally broken at least once.

I haven’t done one of these integrated collages for a couple of years and writing this blog has me interested to do more. I find that working in multiple ways (watercolor, watercolor and ink, stained collage, integrated collage) helps everything in painting. I don’t want to do the same painting over and over – it would bore me and if I’m bored I’m sure it is obvious to viewers.

Have fun! If you try this method, please send back a note. I’d love to see results!

Note: You can see by the title that I’m not a fan of Starbucks taking two spots in our plaza. They already were part of a remodel of a beautiful bank building and then pushed out a small local coffee shop. Sometimes progress isn’t!

Watercolor Musings: Integrated Collage – Step 3

Watercolor Musings: Integrated Collage – Step 3: “Step 3: More paint is added The addition of paint in the sky area begins to put more emphasis on the light coming through the windows onto …”

Integrated Collage – Step 3

Step 3: More paint is added

The addition of paint in the sky area begins to put more emphasis on the light coming through the windows onto the sidewalk. I especially like the results when the transition from stained rice paper to watercolor is discovered rather than the first thing seen.

This scene, in the historic section of Orange, California, is perhaps the most painted spot in the city. The notch between the two taller buildings makes for a nice negative space. It was a newspaper building for years and years and the alley beside it was the place where the “newsies” or newspaper boys would fold the papers and go off on their routes on bicycles. Later it was an architect’s business, then a local coffee shop and now? It’s a Starbucks…even though we have one diagonally across the plaza. Sigh….

Final version coming tomorrow.

Watercolor Musings: Integrated Collage – Step 2

Watercolor Musings: Integrated Collage – Step 2: “Drawing and the beginnings of watercolor are added The second step is a contour drawing of the subject and the the addition of watercolor. …”

Integrated Collage – Step 2

Drawing and the beginnings of watercolor are added

The second step is a contour drawing of the subject and the the addition of watercolor. It’s necessary to work as dryly as possible since the watercolor can “creep” beneath the collaged papers and go just where you don’t want it! The image is both within the collaged areas and into the white. You can see that on the building on the left at the roof line and where the posts extend into the darker area. The white paint on the building on the right and in the left foreground is permanent white gouache which is much preferable to white watercolor.

I’ll post step three tomorrow!

Watercolor Musings: Integrated Collage

Watercolor Musings: Integrated Collage: “A few years ago I began to play with the combination of watercolor, ink and collage. It all began because I needed an additional lesson when…”

Integrated Collage

A few years ago I began to play with the combination of watercolor, ink and collage. It all began because I needed an additional lesson when I was teaching a workshop over several days. After exploring the attributes of ink alone and ink with watercolor, I introduced the element of stained rice paper collaged to the paper as a first step. I don’t try to visualize any particular subject matter at this point since it would tend to influence me.

I want to only be aware of the shapes – both the collaged areas as well as the white paper. The line drawing is next and I locate the subject matter watching the areas when it overlaps the colored rice paper. I find that I work better having an abstract design to work on for the drawing. I’ve done it the other way where the drawing is done in permanent ink prior to the collaged papers. I just don’t like the results of those attempts but that’s just me. You have to try different approaches to find which one works for you.

Tomorrow I will post step #2.


Watercolor Musings: My Almost Favorite Brush Pen

Watercolor Musings: My Almost Favorite Brush Pen: “Duomo, Siena, ItalySepia Ink & Watercolor Somewhat recently, I found a wonderful new brush pen with water-soluble ink in sepia. T…”

Watercolor Musings: My Almost Favorite Brush Pen

Watercolor Musings: My Almost Favorite Brush Pen: “Duomo, Siena, ItalySepia Ink & Watercolor Somewhat recently, I found a wonderful new brush pen with water-soluble ink in sepia. T…”

My Almost Favorite Brush Pen

Duomo, Siena, Italy
Sepia Ink & Watercolor 
Somewhat recently, I found a wonderful new brush pen with water-soluble ink in sepia. The ink is in the cartridge, which can be replaced very inexpensively. The sepia is warm in tone so it melds with the subsequent watercolor and is not so insistent at black ink. So, why is it “almost” my favorite? That will take some explaining.
I’ve been working in ink and watercolor for many years. It has morphed from a sketching tool in sketchbooks to an integral part of my painting. I draw very quickly and the brush enables me to draw with expression since pressure determines the thickness of the line. The best analogy is that the line “dances” across the page. I don’t begin with pencil, as that would inhibit the ink line – I just go for it and absolutely love the process.
When I was painting in Provence 18 months ago, I concentrated on doing contour drawing with my brush pen rather than working on paintings since the subject matter was so wonderful that I didn’t want to miss any opportunity to capture it on site. I brought home over 20 drawings, 14”x20”, some with a bit of watercolor but most with none. These drawings were done in black water-soluble ink…soluble, that is, for 2 weeks.
My first sepia ink drawings were done with a brush pen from Japan. I could not read the inserts but I didn’t consider that a problem. The brush handled beautifully and the warmer ink color made a better combination with watercolor. This was especially so when the landscape is predominately cool in temperature.
I’d used up several sepia cartridges when I happened upon one with English in the insert. There was a cautionary note about the ink being unstable in bright light. The result is that I’ll need to frame any paintings from this group with UV protected Plexiglas. I am so glad that I read that important note before I went any further.
So, yes, this is almost my favorite brush pen. I’m now experimenting with other brushes and inks to achieve the same results and have promised myself to be diligent in finding out information about any new tool.

Watercolor Musings: Good Advice

Watercolor Musings: Good Advice: “Line Drawing, Lucca About drawing: When you can just plop down and get a drawing, there is a real sense of freedom. Had I gotten a quick p…”